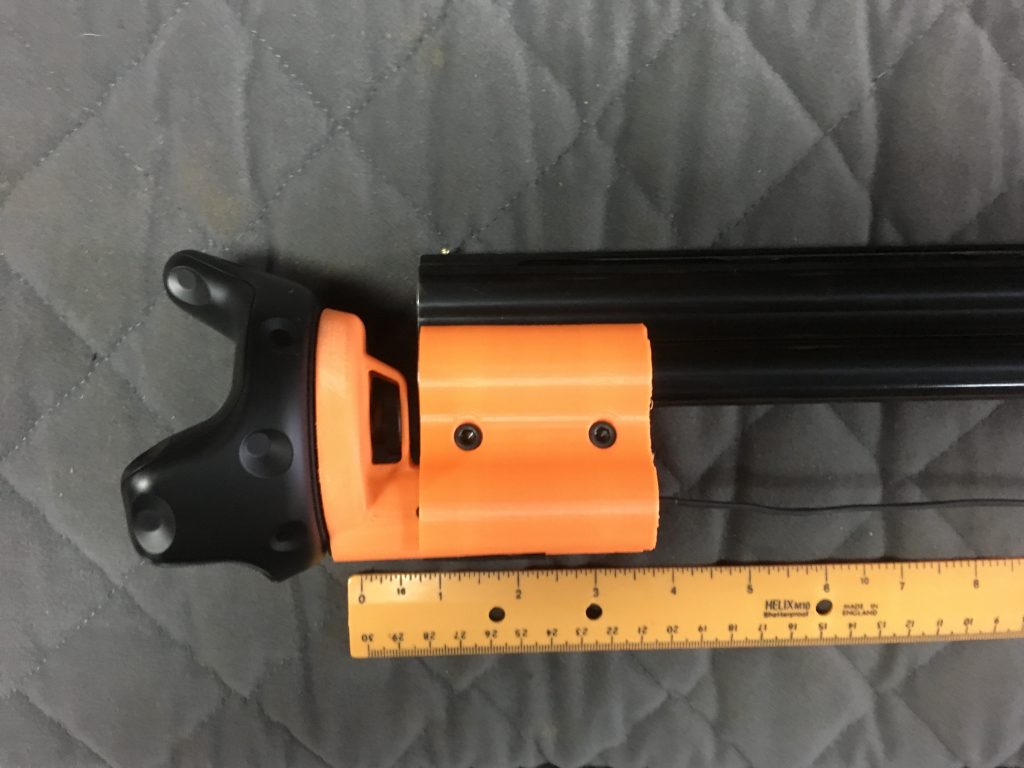
What You Need for the VR Shotgun Shooting Simulator
1. A Gaming PC Computer
A gaming PC that can run virtual reality programs
We recommend using the HTC Vive virtual reality system Here are some compatible PCs
2. Virtual Reality system
We strongly recommend the HTC Vive system supports the new VR gun controller on your own shotgun
Oculus Rift will not support the VR gun controller
For Oculus VR we recommend you put the hand controllers on a gun peripheral bracket
3. CLAZER software
Download CLAZER for HTC Vive on Steam VR Online Store
Production model now shipping and it fits your shotgun
6. A shotgun – over/ under 12 or 20 gauge
Red/ Blue practice shotguns
AirSoft shotguns with an accessory rail that holds a 1″ diameter laser or flashlight.
7. Install the VR Tracker and Gun Controller on your shotgun
- Start with VR mode turned off in Steam
- Plug Vive Tracker USB dongle and extension adapter into computer USB port
- Enable VR mode in Steam
- Plug in the left Hand Controller via USB to pair them to Steam
- Right click the SteamVR window and select Devices->Pair Controller
- Hold down the button on the Vive Tracker to enable pairing mode
- This may not pair, but a grey icon of the Tracker appears on the SteamVR window
- Hold down the button on the Vive Tracker again to enable pairing mode
- Right click the grey Vive Tracker icon on the SteamVR window and select Pair Tracker
- Vive Tracker and the left Hand Controller should now be paired
Trouble shooting instructions for pairing a Vive Tracker to SteamVR:
- Make sure only a single VR controller is powered on.
- Open SteamVR and ‘Right Click’ on the controller icon.
- Click the ‘Pair Controller’ option to attempt to pair the Tracker with the HMD.
- Hold the ‘Power Button’ on the Vive Tracker until the LED blinks blue. This means it’s in pairing mode.
- A green tracker icon should appear in the SteamVR window indicating a successful pair
Instructions for Lead Tech Gun Controller configuration with Clazer:
- Put your HTC Vive Headset on.
- In VR, Go to the controller bindings screen for Clazer (Bottom left in Settings).
- In the top right under ‘Current Controller’ select the box and change it to ‘Vive Tracker in Hand’.
- Make sure the Default bindings are selected (Default bindings for legacy applications for Vive Trackers in Hand).
- In the upper right hand corner, select the box that says ‘Manage Trackers’.
- Make sure the first box is set to ‘Held in Hand’ and set the second box to right hand.
- Launch Clazer
- When the options appear, use the motion controller in your left hand to select Vive Tracker input.
- Once the Steam Windows application is open, select the STORE tab at the top.
- On the Search Bar, search for CLAZER and select it
- Select Add to Cart
- In Steam, select the LIBRARY tab at the top and install or update CLAZER
- Once installed or updated, in the LIBRARY tab, right click on the installed CLAZER app
- Select the ‘Properties’ options
- Select the Betas tab at the top of the Properties Window
- Enter ‘SynapticSwitch2600‘ for the access code and select CHECK CODE
- Select the ‘development – QA Branch‘ option in the drop-down box
- The beta version will begin to download and will override the normal version.
- You can open per installed CLAZER the same way, through the Library tab.
CAVEAT:
Oculus Rift Touch does not support CLAZER’s gun controller
Samsung Gear will not support CLAZER’s gun controller
If you’re as inept at computers and VR gear as I am, find a kid in the neighborhood that looks sleep deprived, disheveled and over-weight. He’s probably a gamer and he can help sort this out for you.
Then you can teach the kid to shoot something other than zombies. Win win
Please contact us for details.


